(This blog post only reflects my personal opinions and experiences, not of the whole OSM Ireland community or even the board.)
Most of you will be familiar with Mapillary by now, once the go-to street level imagery due to its easy-to-use app and fairly good coverage in certain areas. Since its purchase by Meta, the user friendliness has arguably declined (for example, they set the capturing distance now; contributors have no influence on it in the app). About two years ago, yet another (I won’t go into any of the others, because I have not tried them sufficiently) new solution was introduced to the mapping community – Panoramax. I have seemingly been uploading to their OpenStreetMap instance since April of 2024, but there is also a MapComplete instance where I only today discovered I had uploaded to in January of 2023.
Video Tutorial
I usually upload my images captured with the Meta sponsored GoPro to the OSM instance after uploading them to Mapillary, so I had had no reason to try out flat photographs, but last week I did, and I made the following tutorial video (with chapters & proof-read subtitles) which some might find helpful. At the time, I wasn’t aware that there was actually a Panoramax Android app, so apologies for saying in the video that there was not:
Two days after publishing the video, I read in the weeklyOSM newsletter that the 6th version of the beta version had been released which you can find here.
Capturing imagery with Open Camera
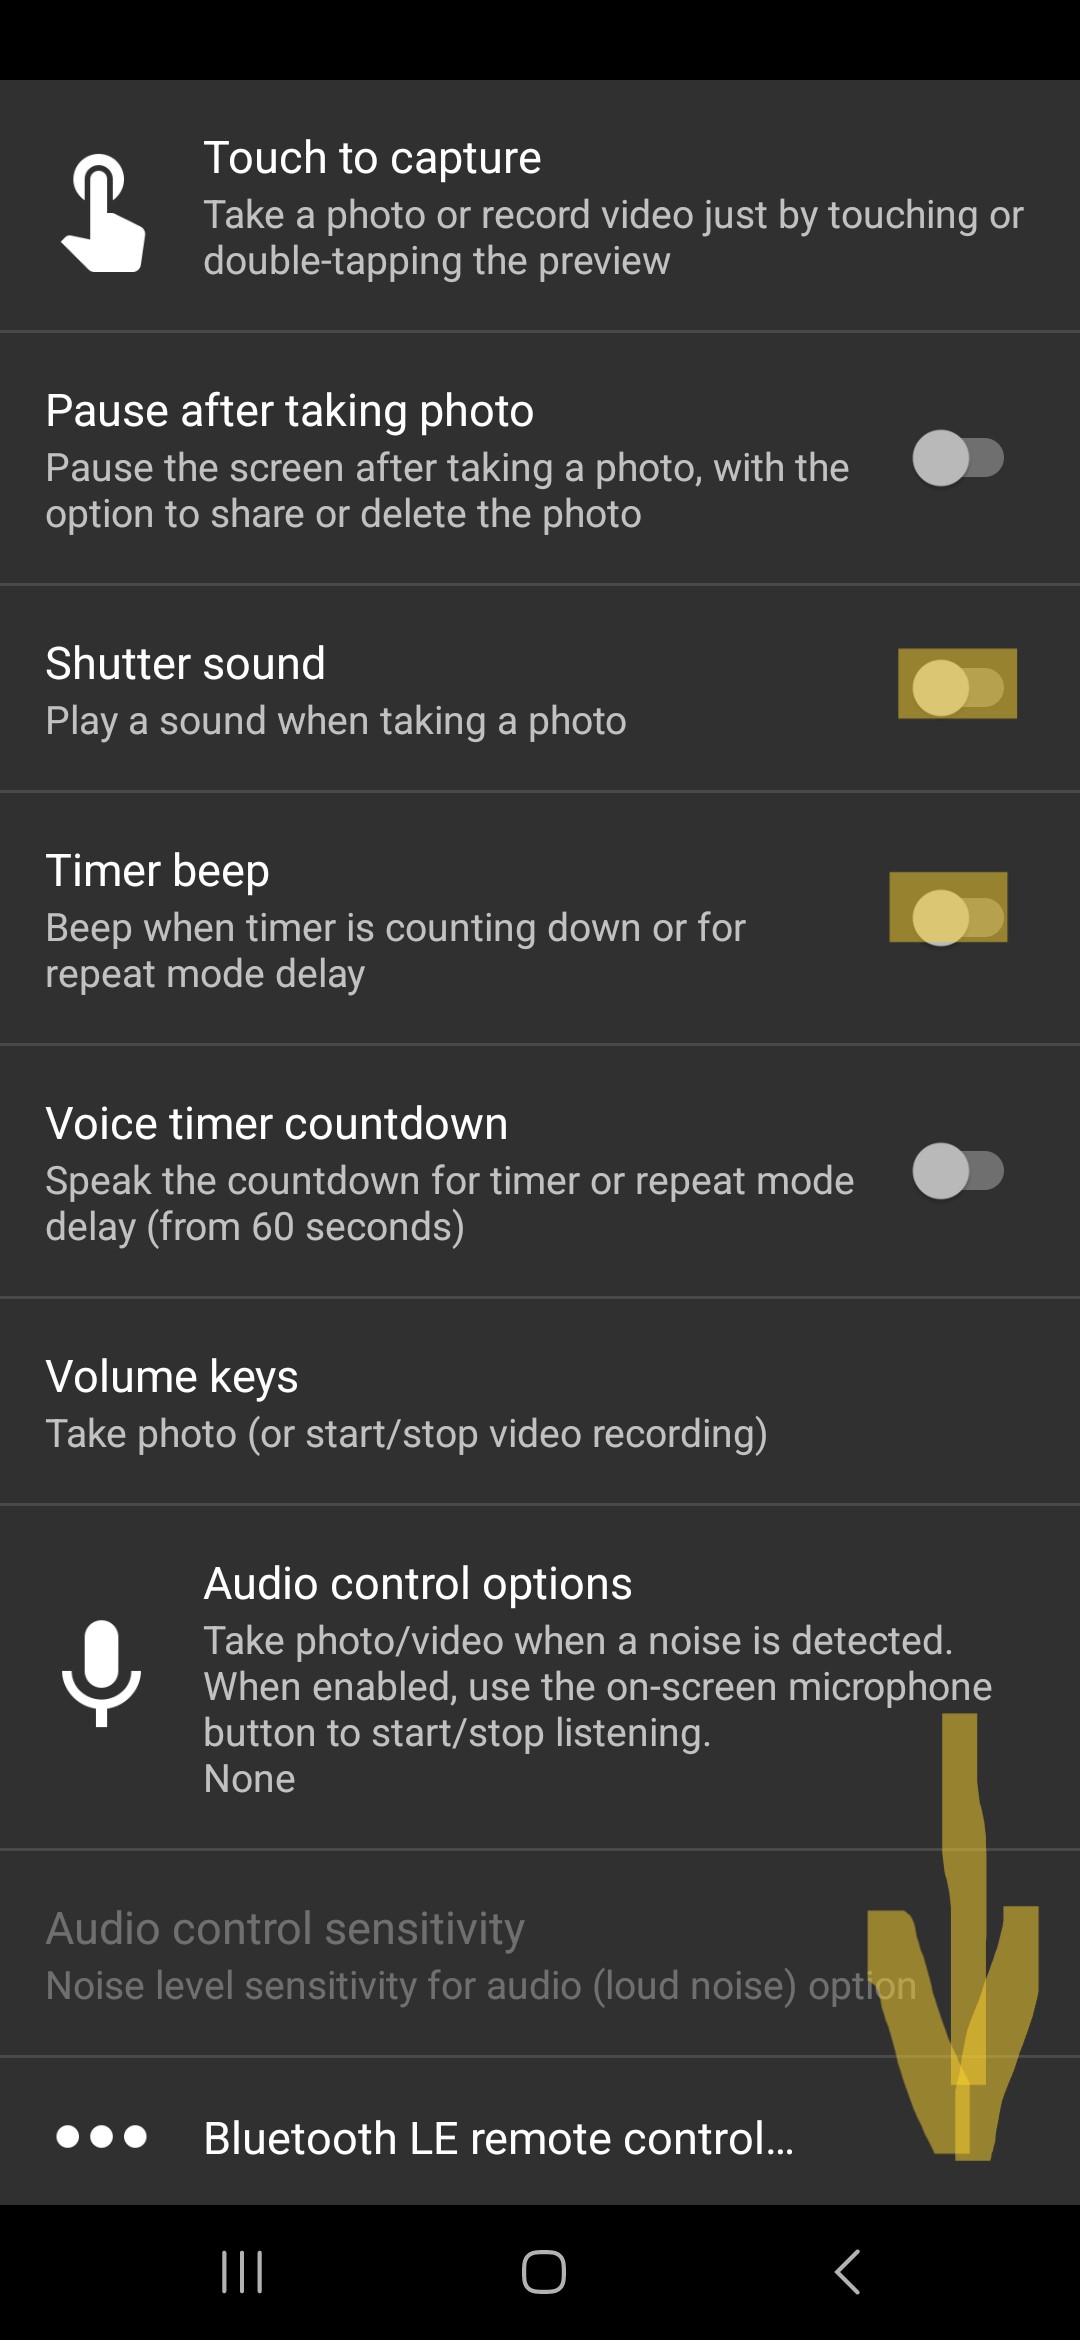
Since I did not use the Panoramax app at the time, but the OpenSource app Open Camera, I thought it useful to share screenshots of some of the settings here, because it might be easier than to follow it in the video.
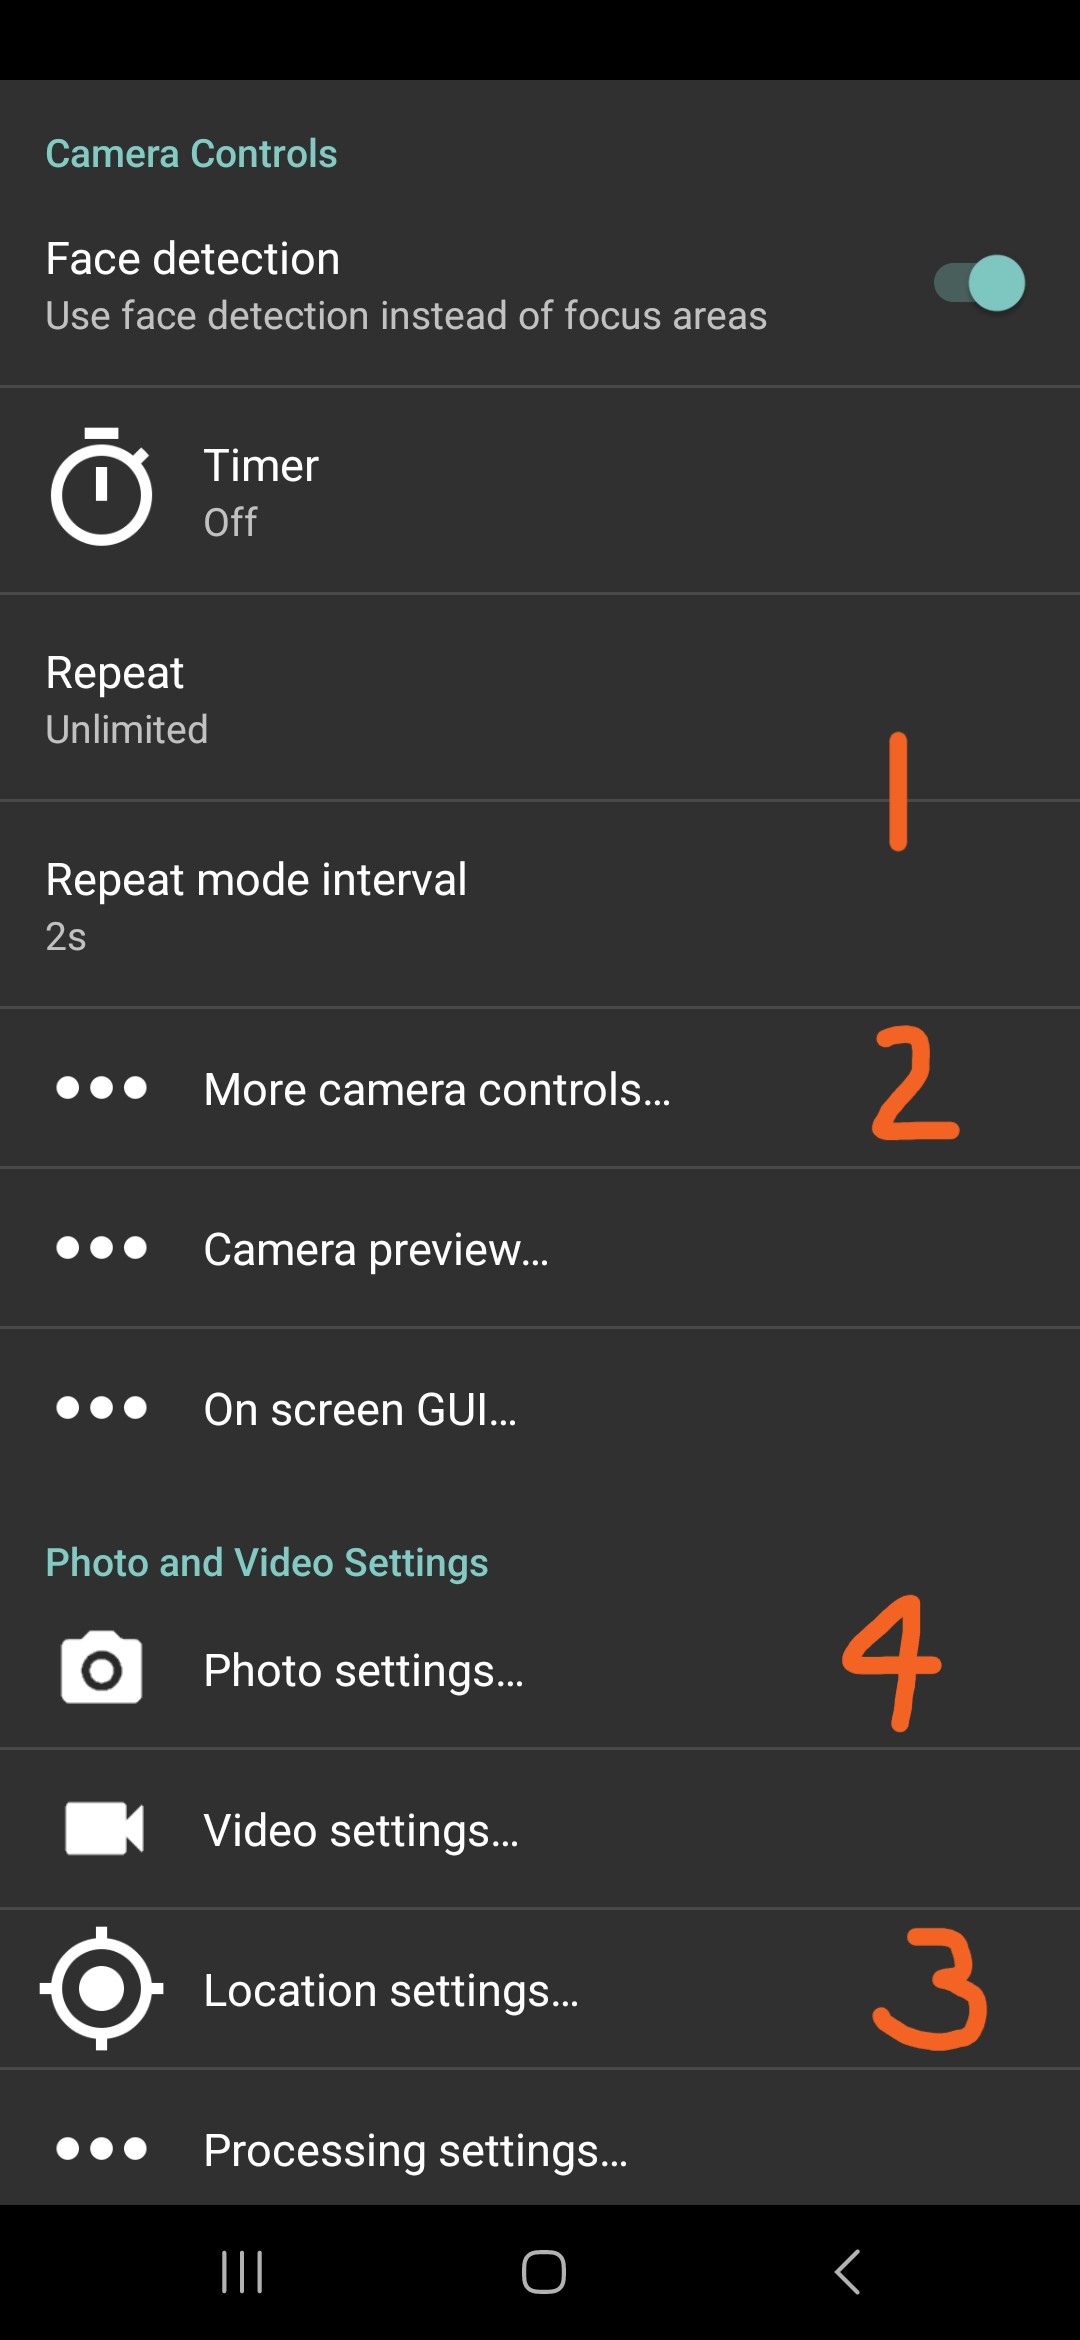
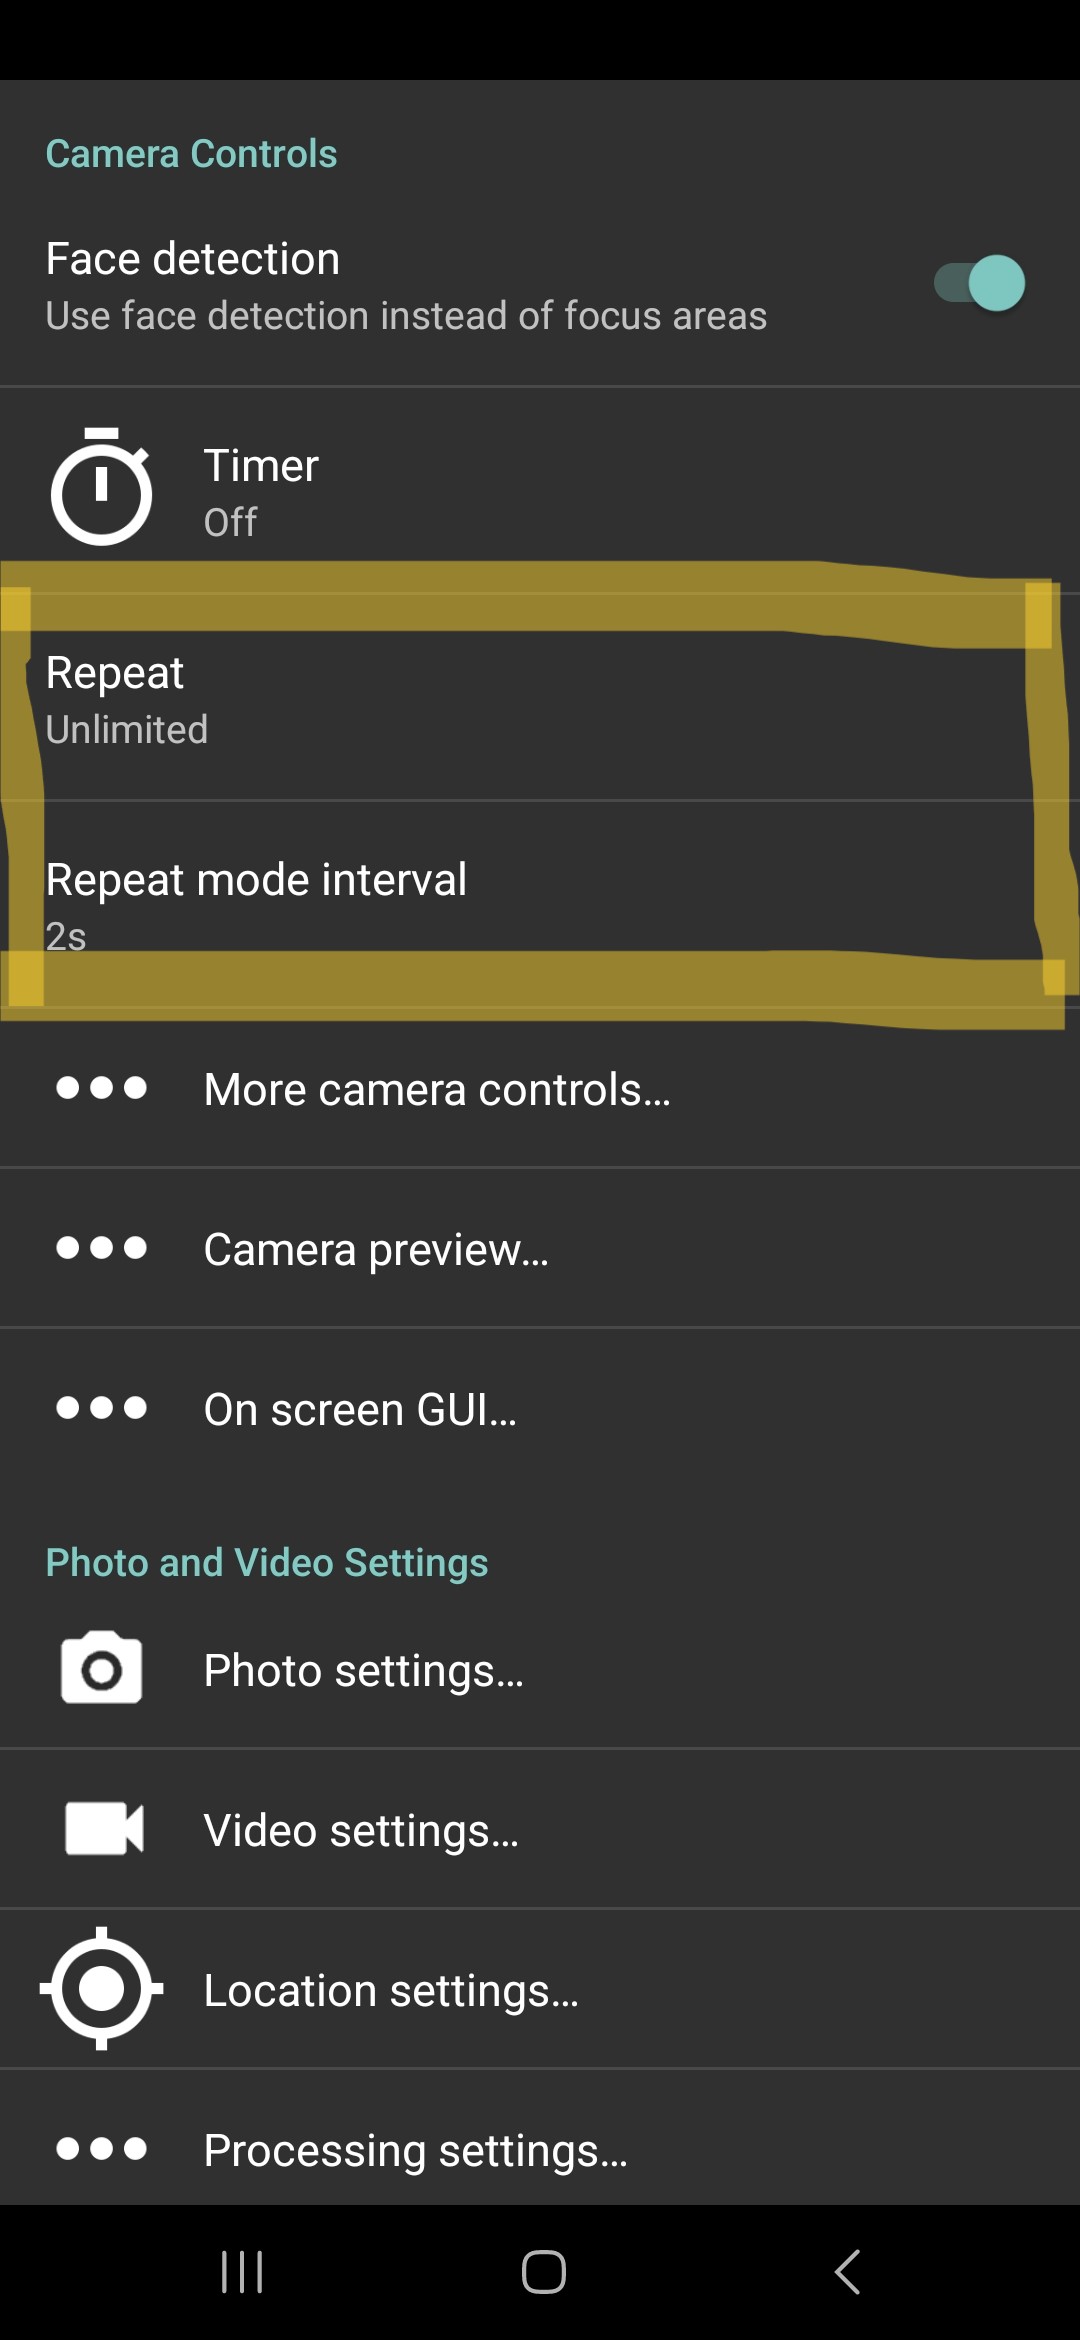
For capturing sequences, I would highly recommend using a micro SD card, so you don’t run out of storage space easily. Furthermore, it might be easier to upload your sequences on a larger screen later.
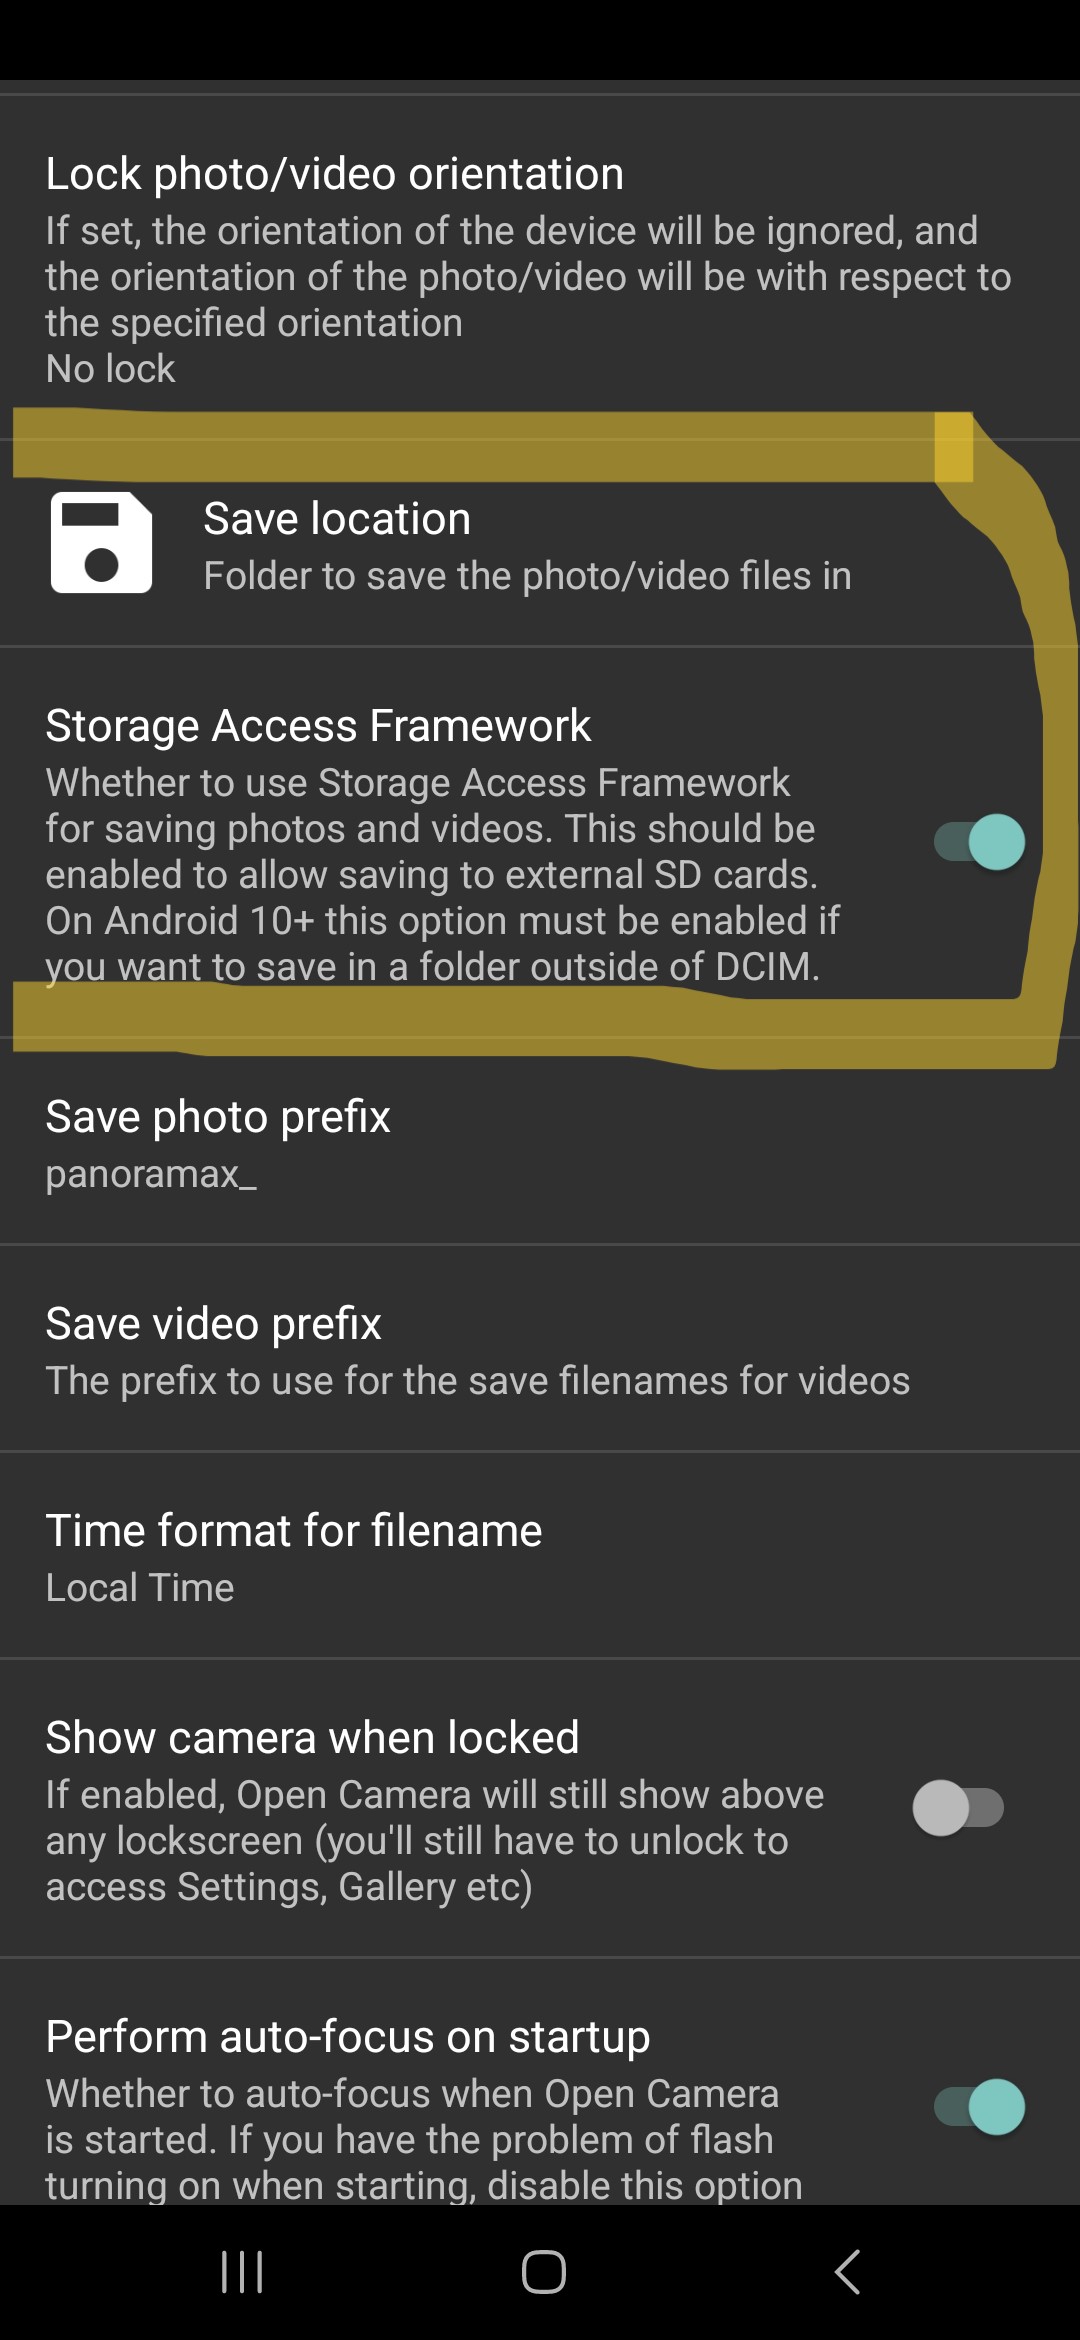
You can also change the file prefix, but it’s not really required.
Location settings
Obviously essential for street-level imagery is the option to save GPS information in the exif data.
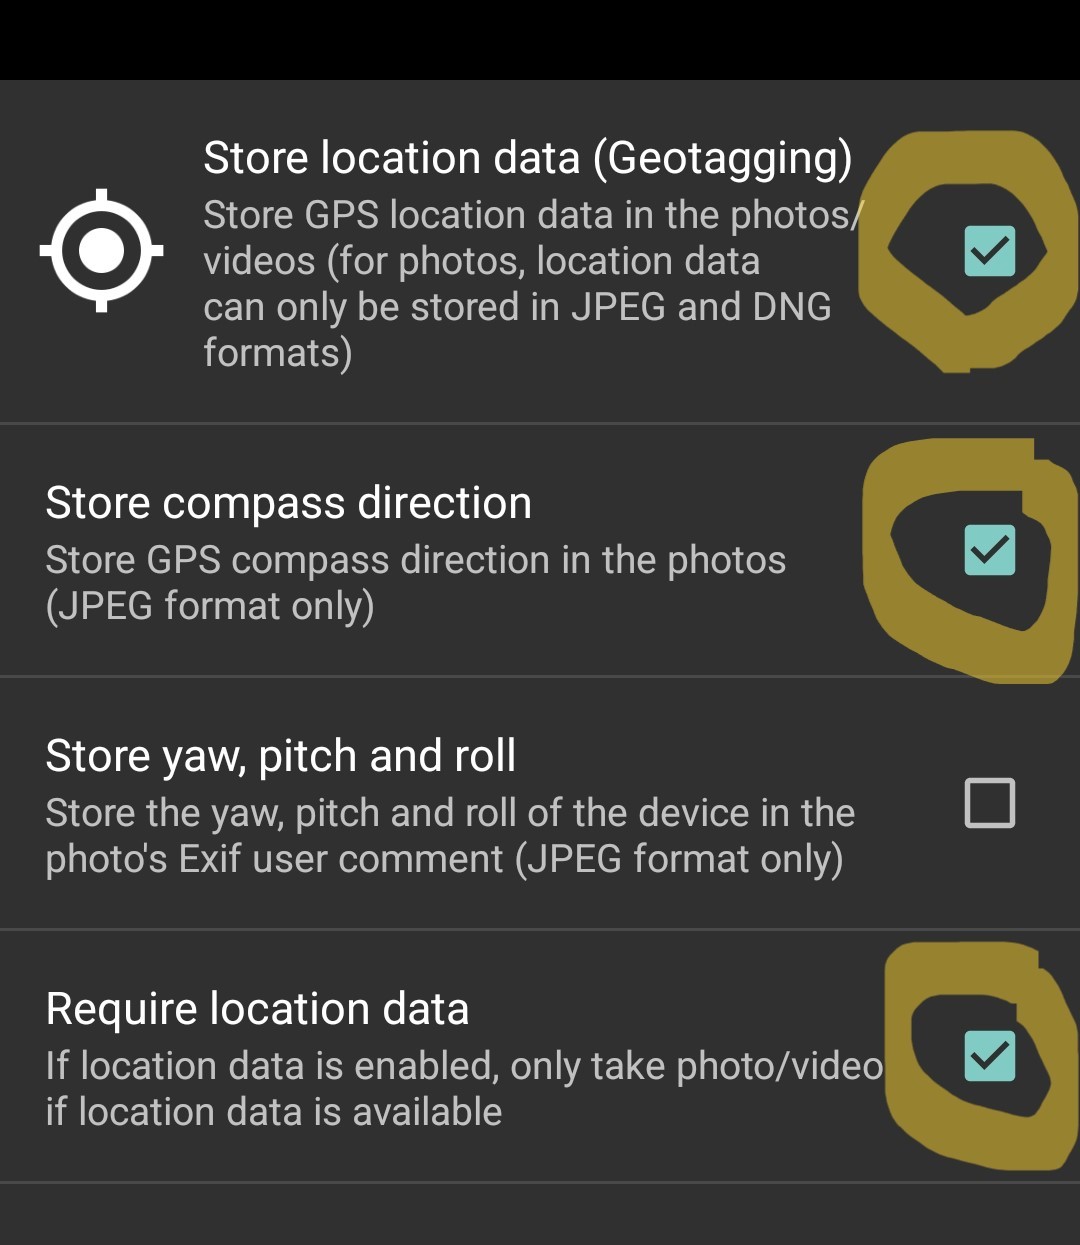
Photo settings
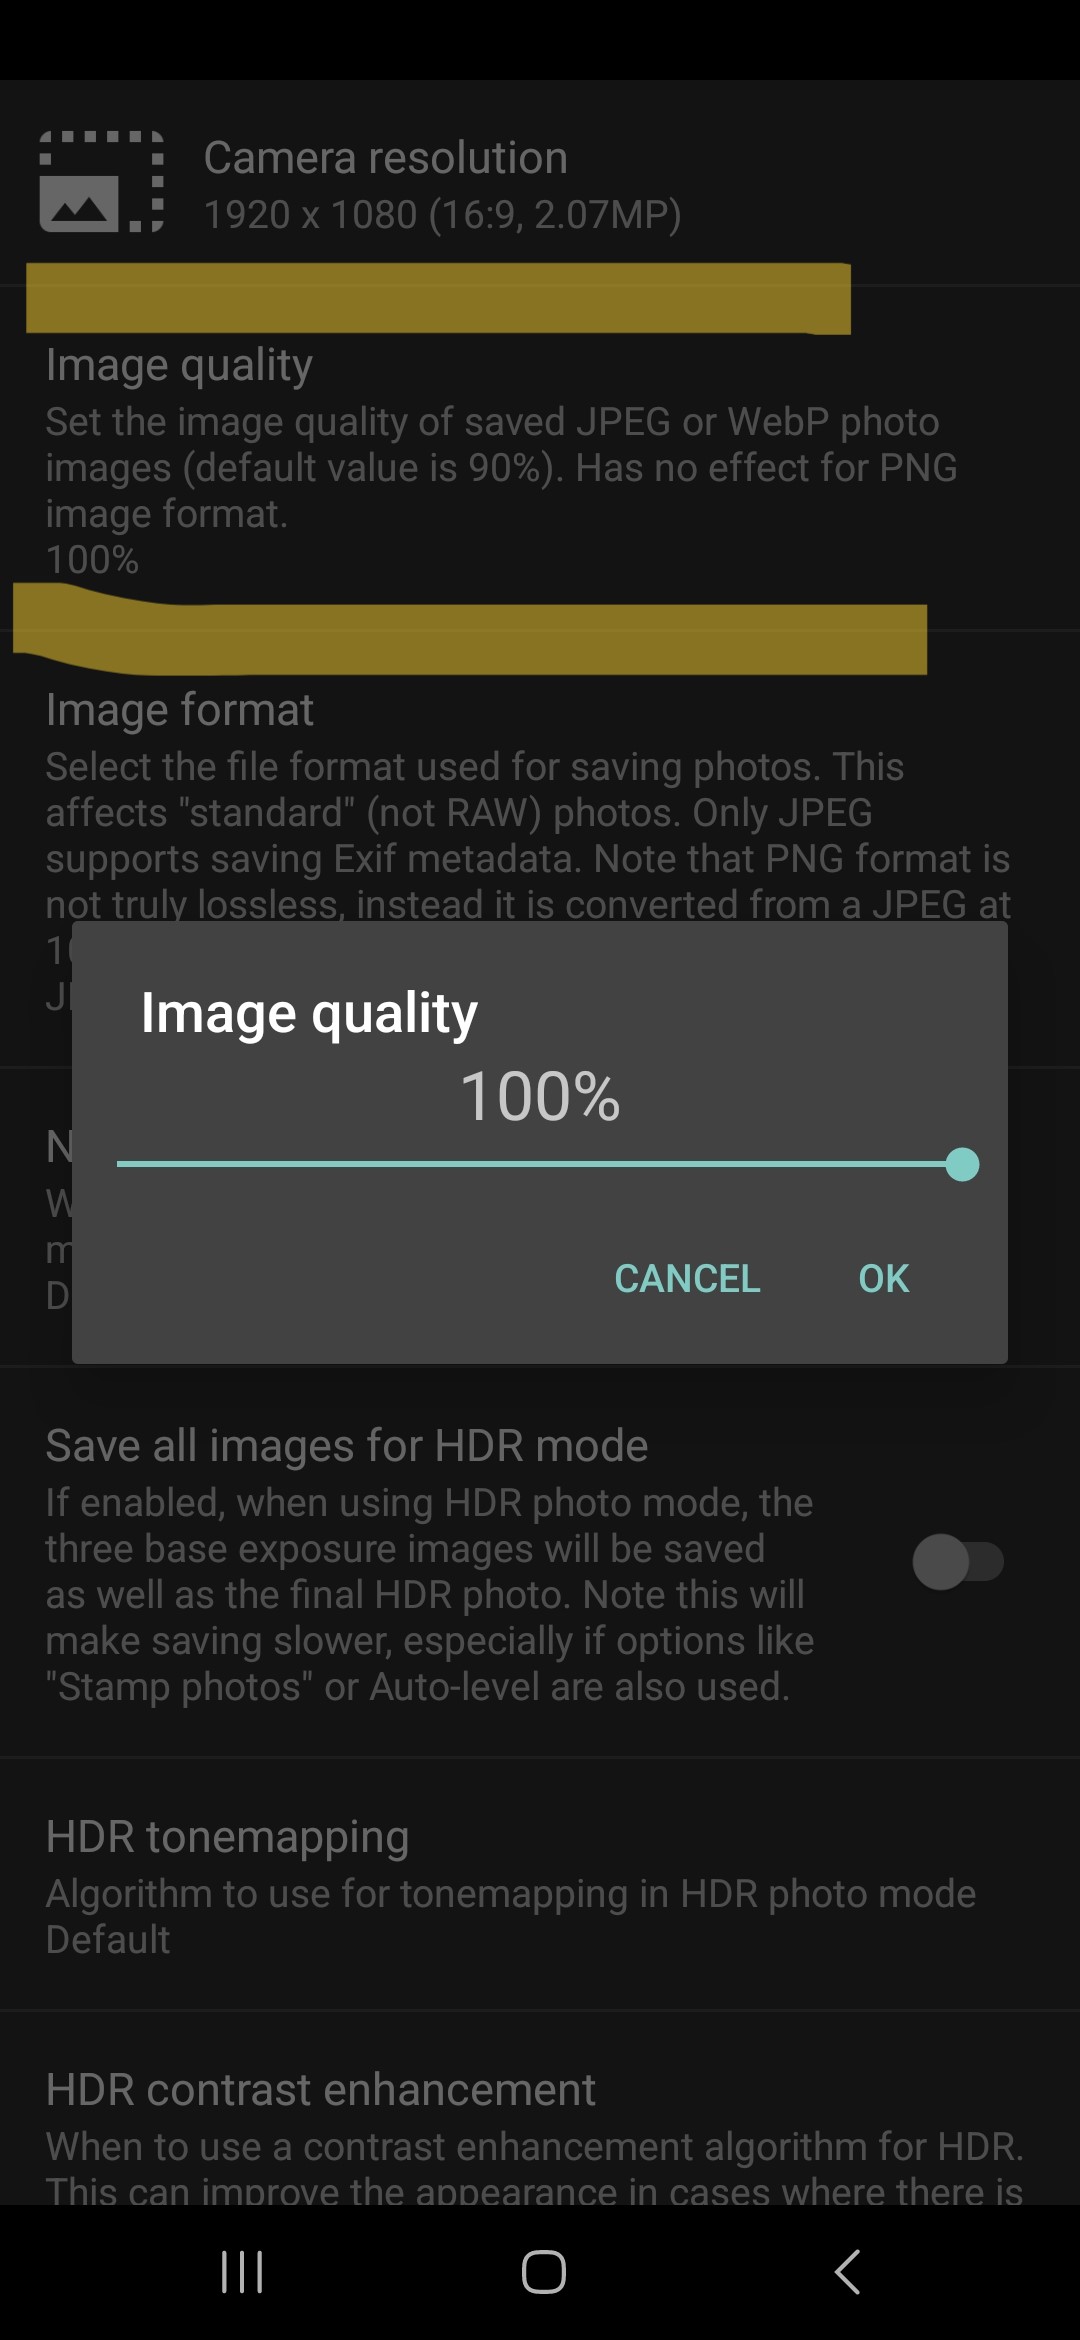
Choose a camera resolution that you think works best, probably a 16:9 one works well.
Set the photo quality to 100%. Panoramax only allows for the upload of *.jpg images, so changing the Image format to any other file format would be counterproductive.
With all these settings set, you are ready to capture your first sequence. Just set up the phone horizontally and press the blue button to start capturing the sequence. I countdown on the screen shows you when to expect the next capture. To end the sequence, press the blue button again.
Using the Panoramax app for capture
The Panoramax app in its beta version is only available as an *.apk file (here). To install on your Android phone, go to the latest version and download the file. Execute to install. You might have to give your browser permission to install first. It has also not been translated from French yet. You can help out here.
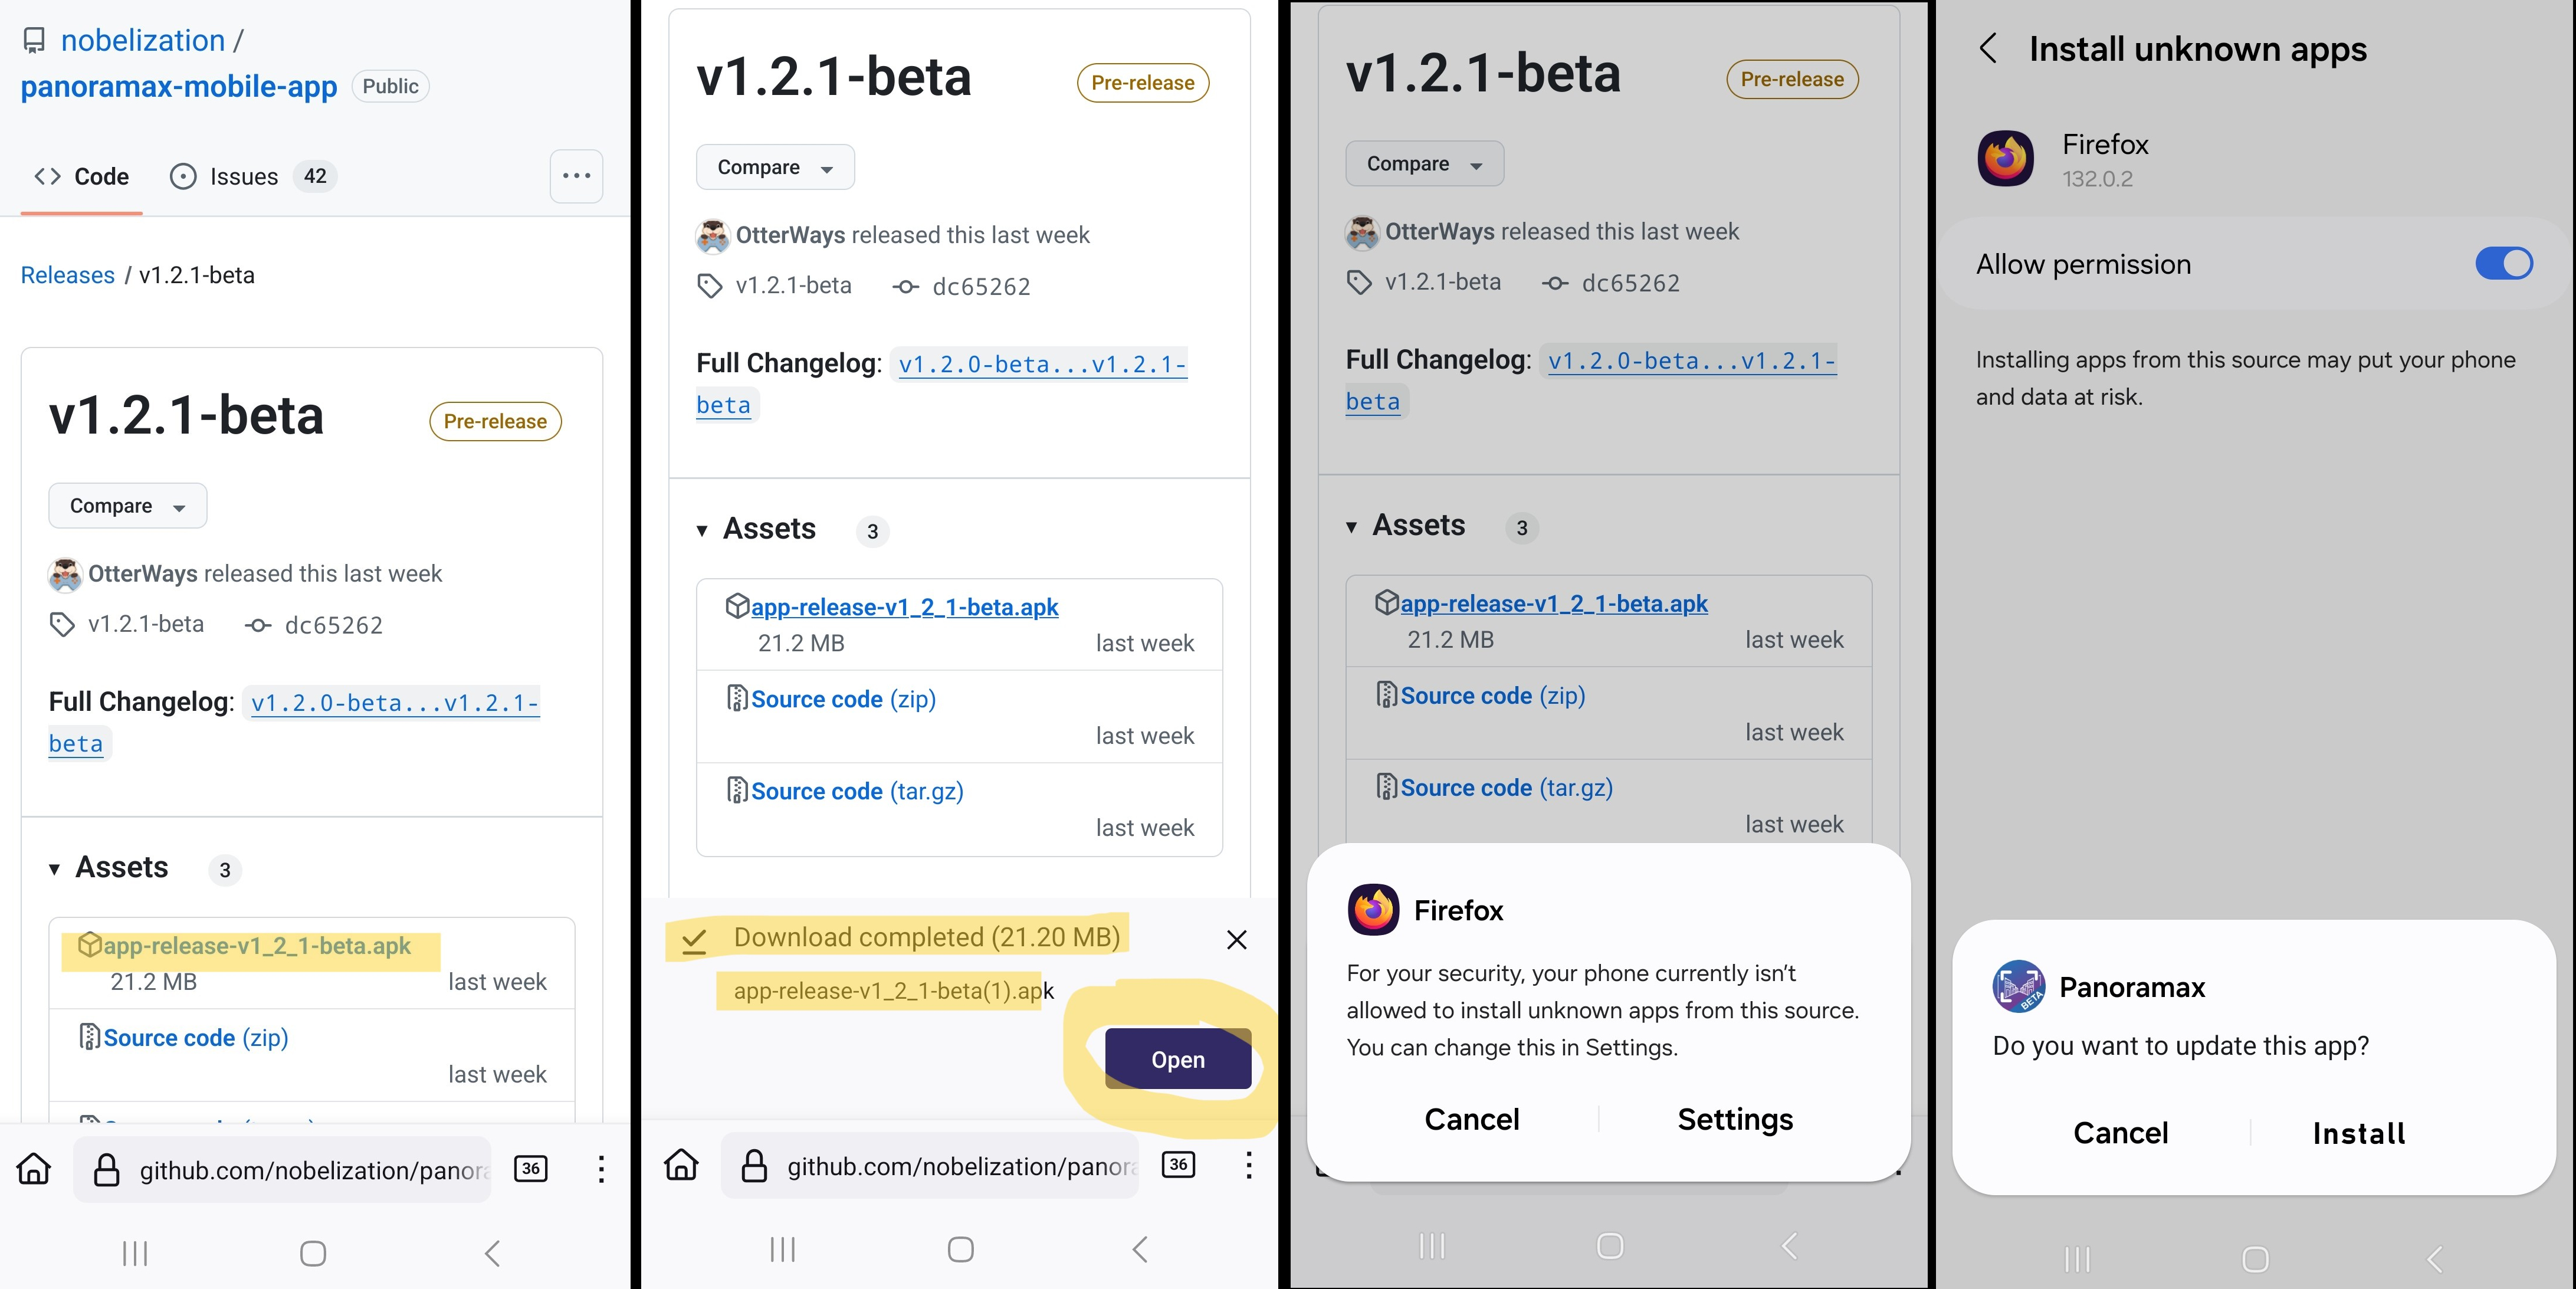
Once installed, it will suggest to open the app, but that did not work for me directly from the install. So, just find the app on the phone and open from there.
The app itself in version 1.2.1 beta is as primitive as could be; there are no settings whatsoever. You can only choose between taking a photo and a sequence. Since I would not want to clog up storage space on my phone, I will only use this app for single photographs (of newly opened shops, defibrillator locations and such like) for now.
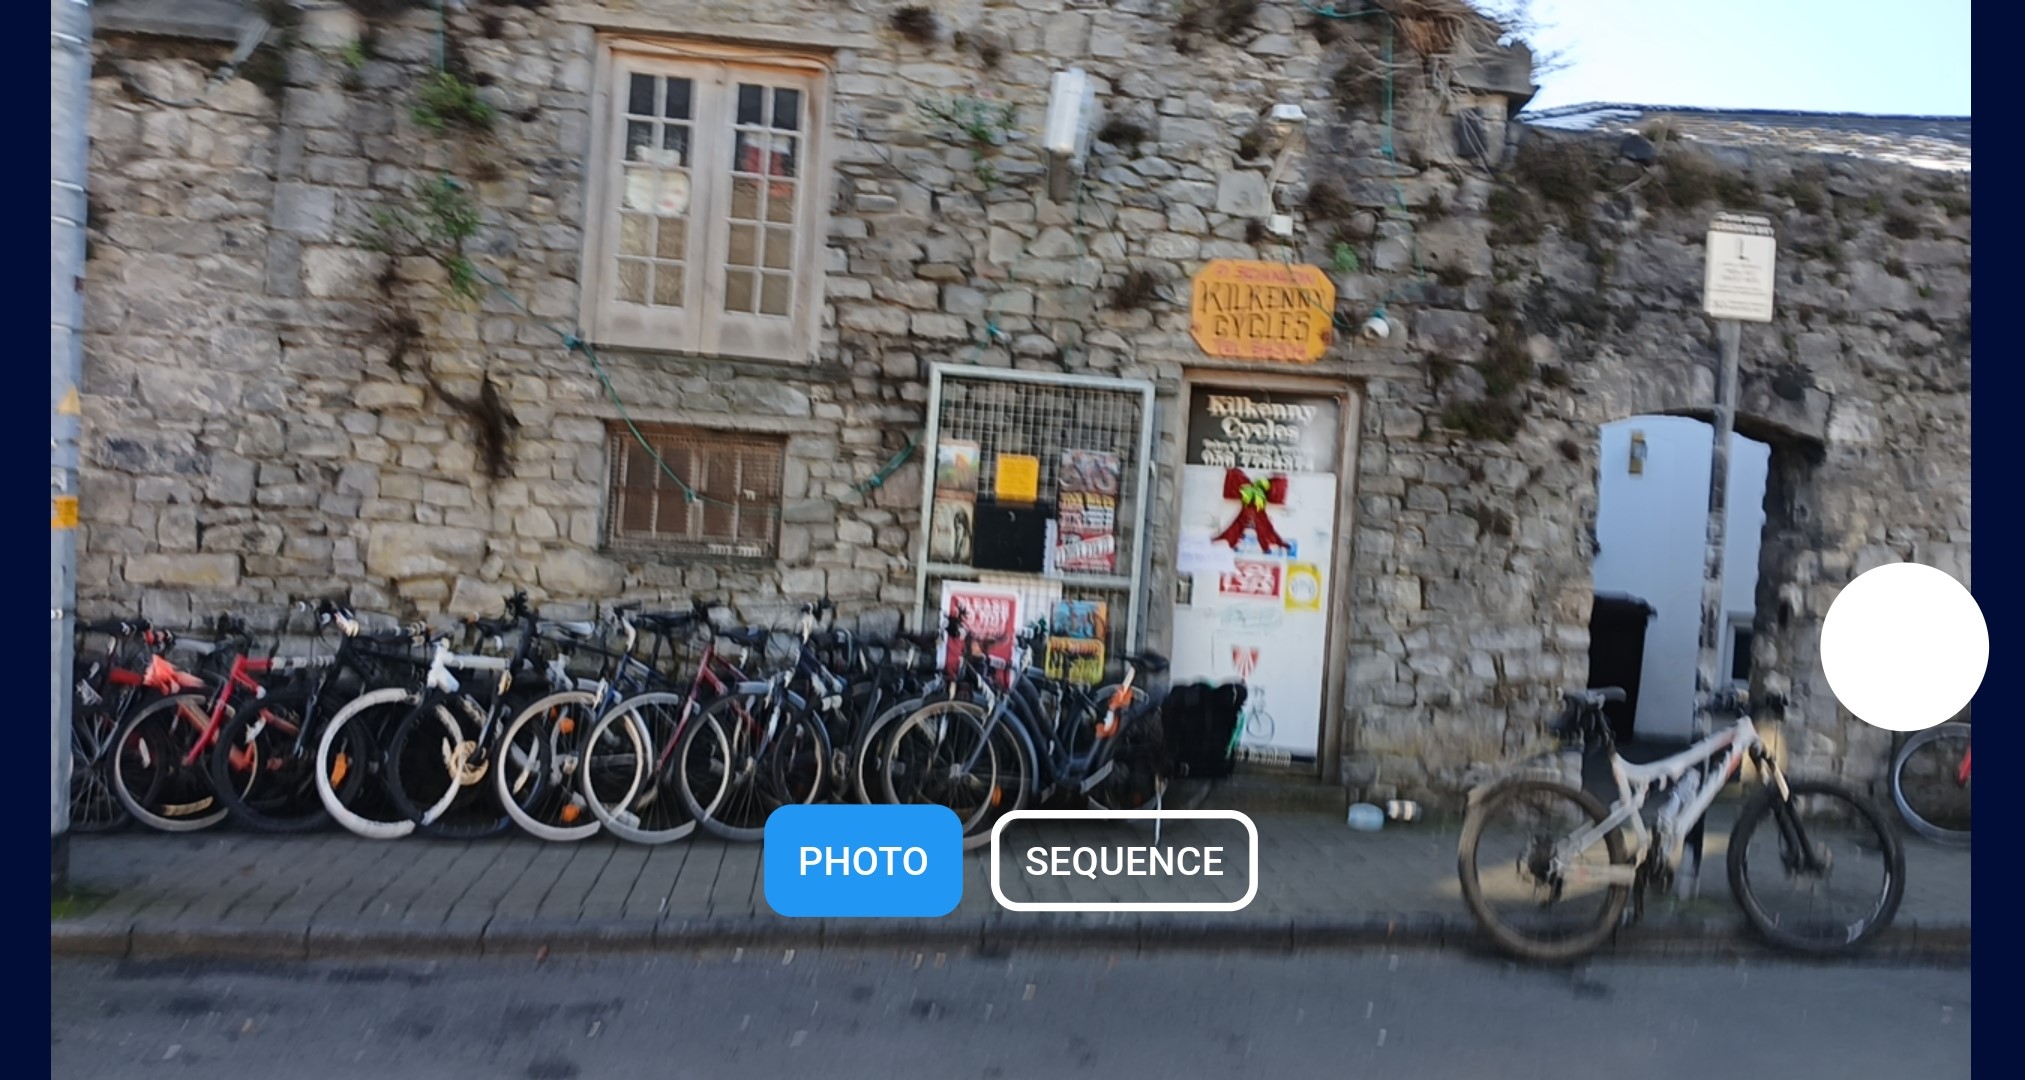
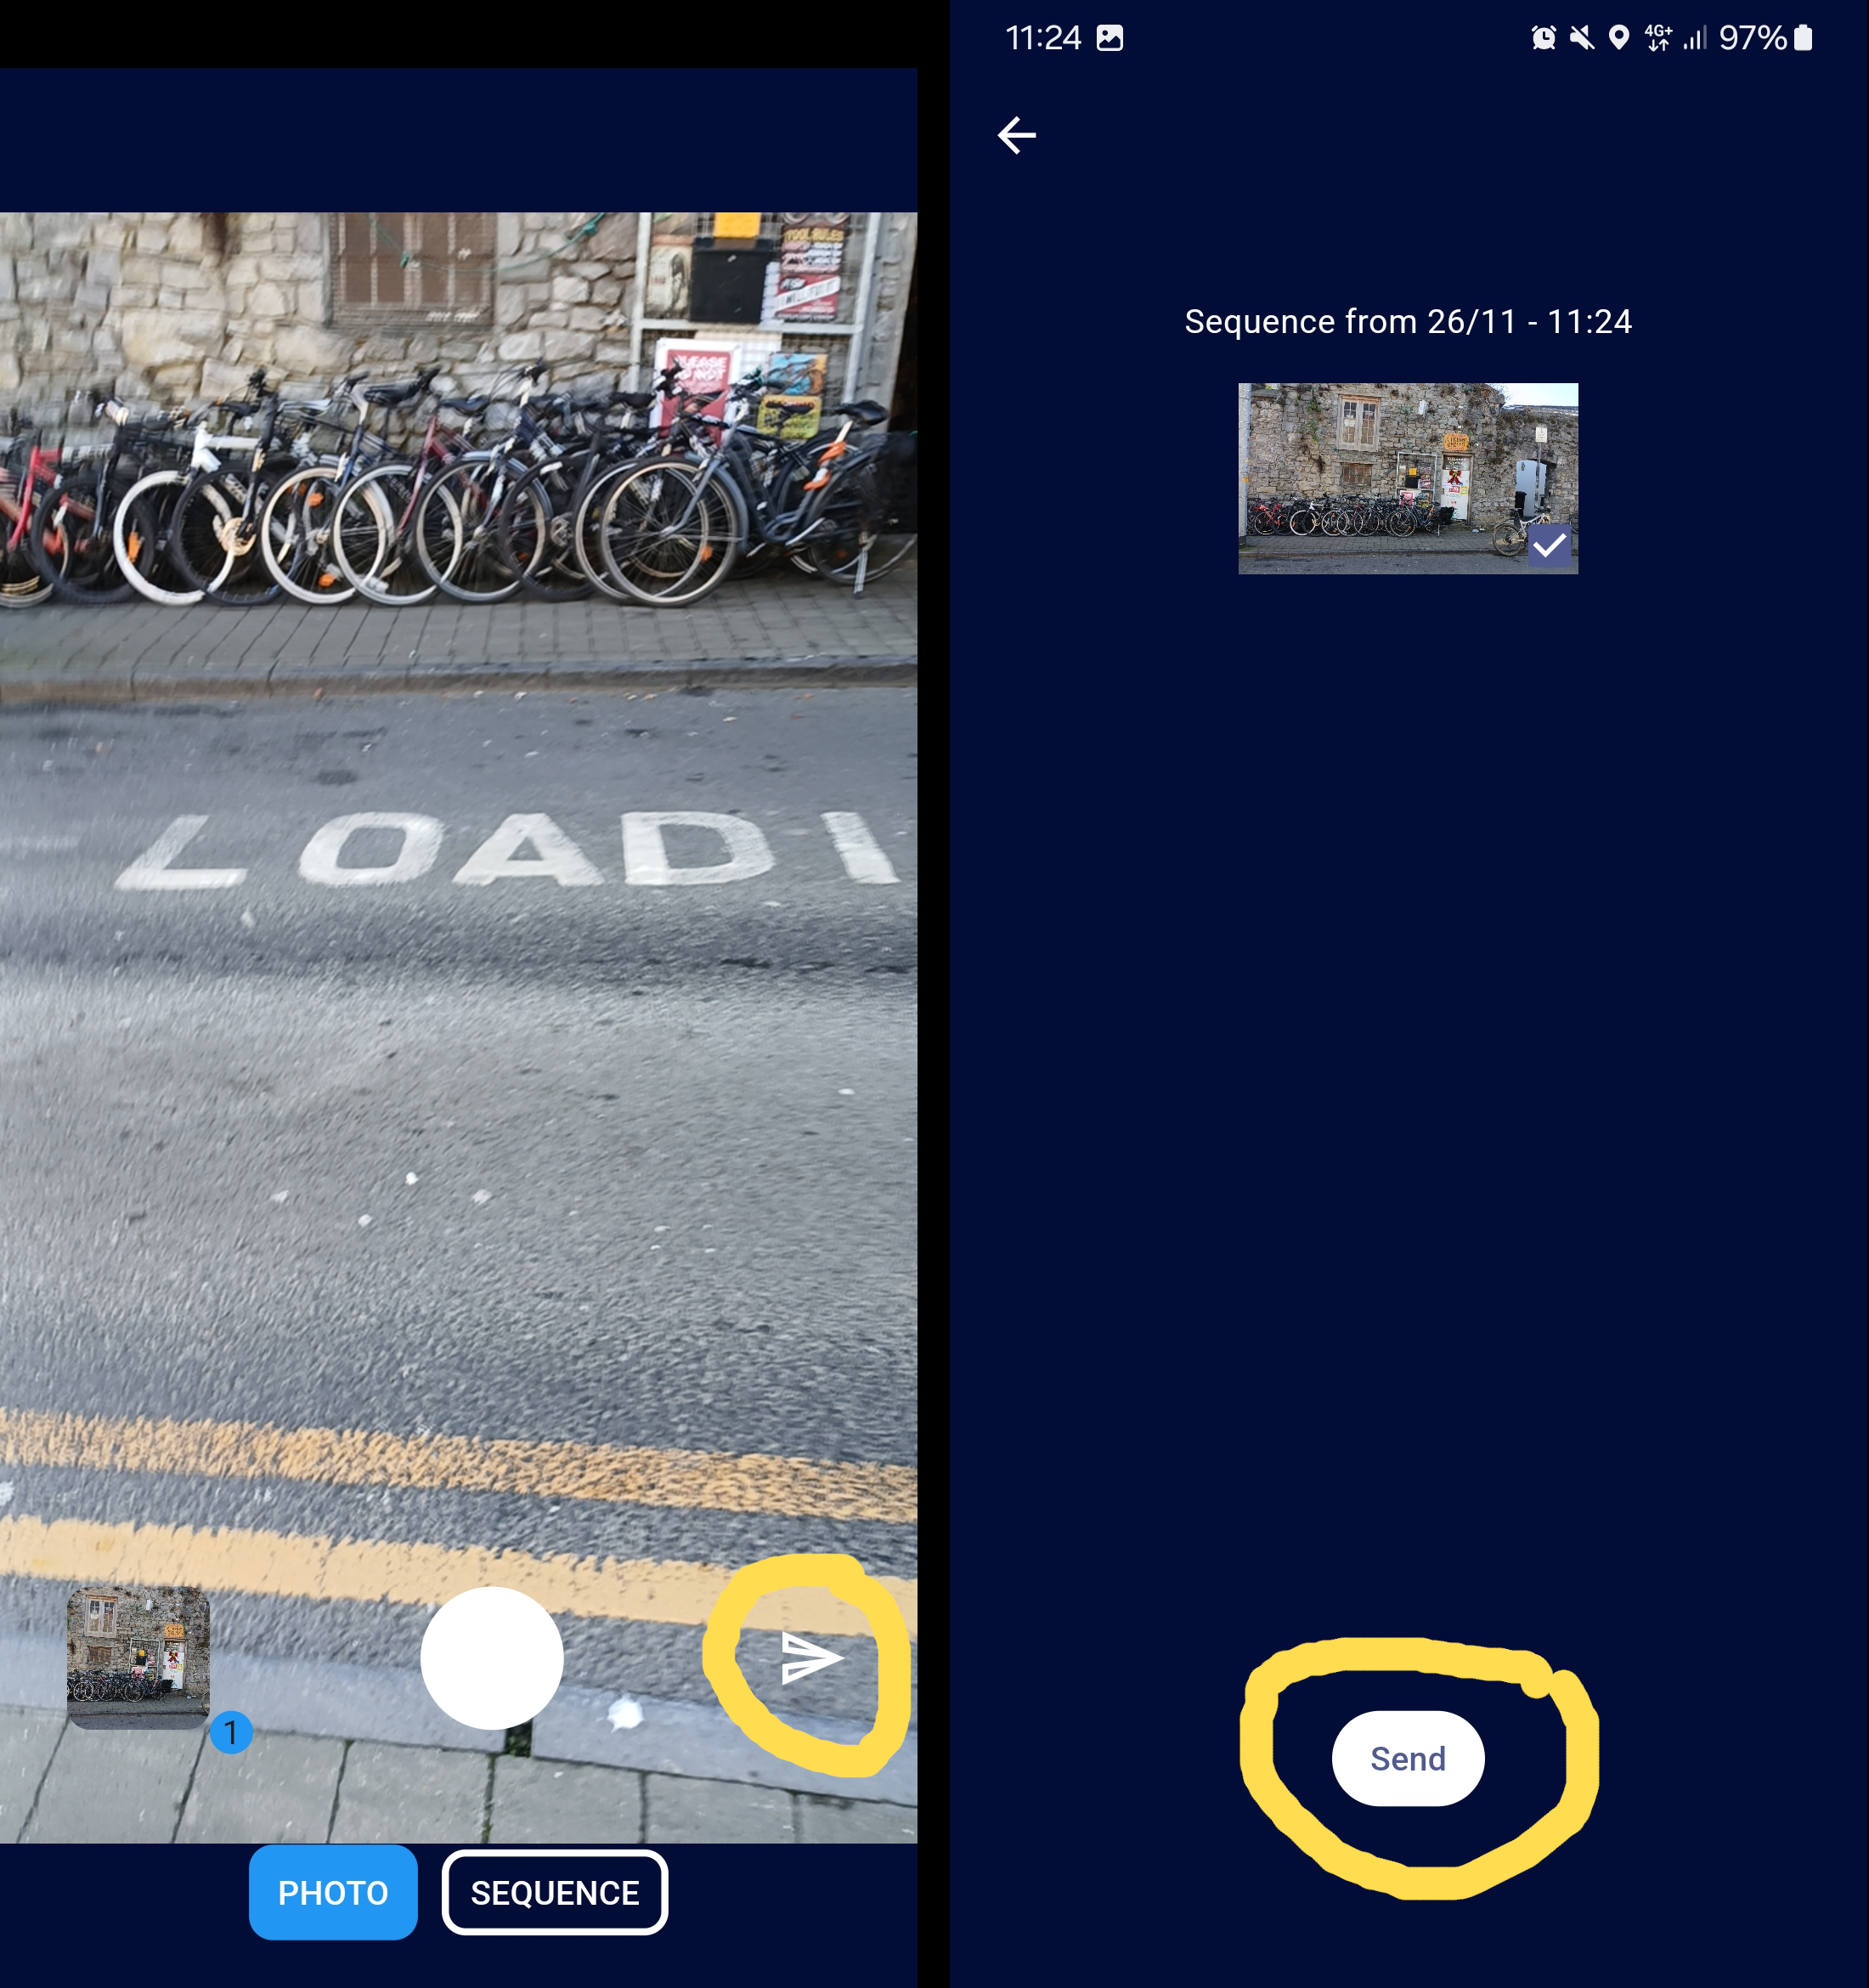
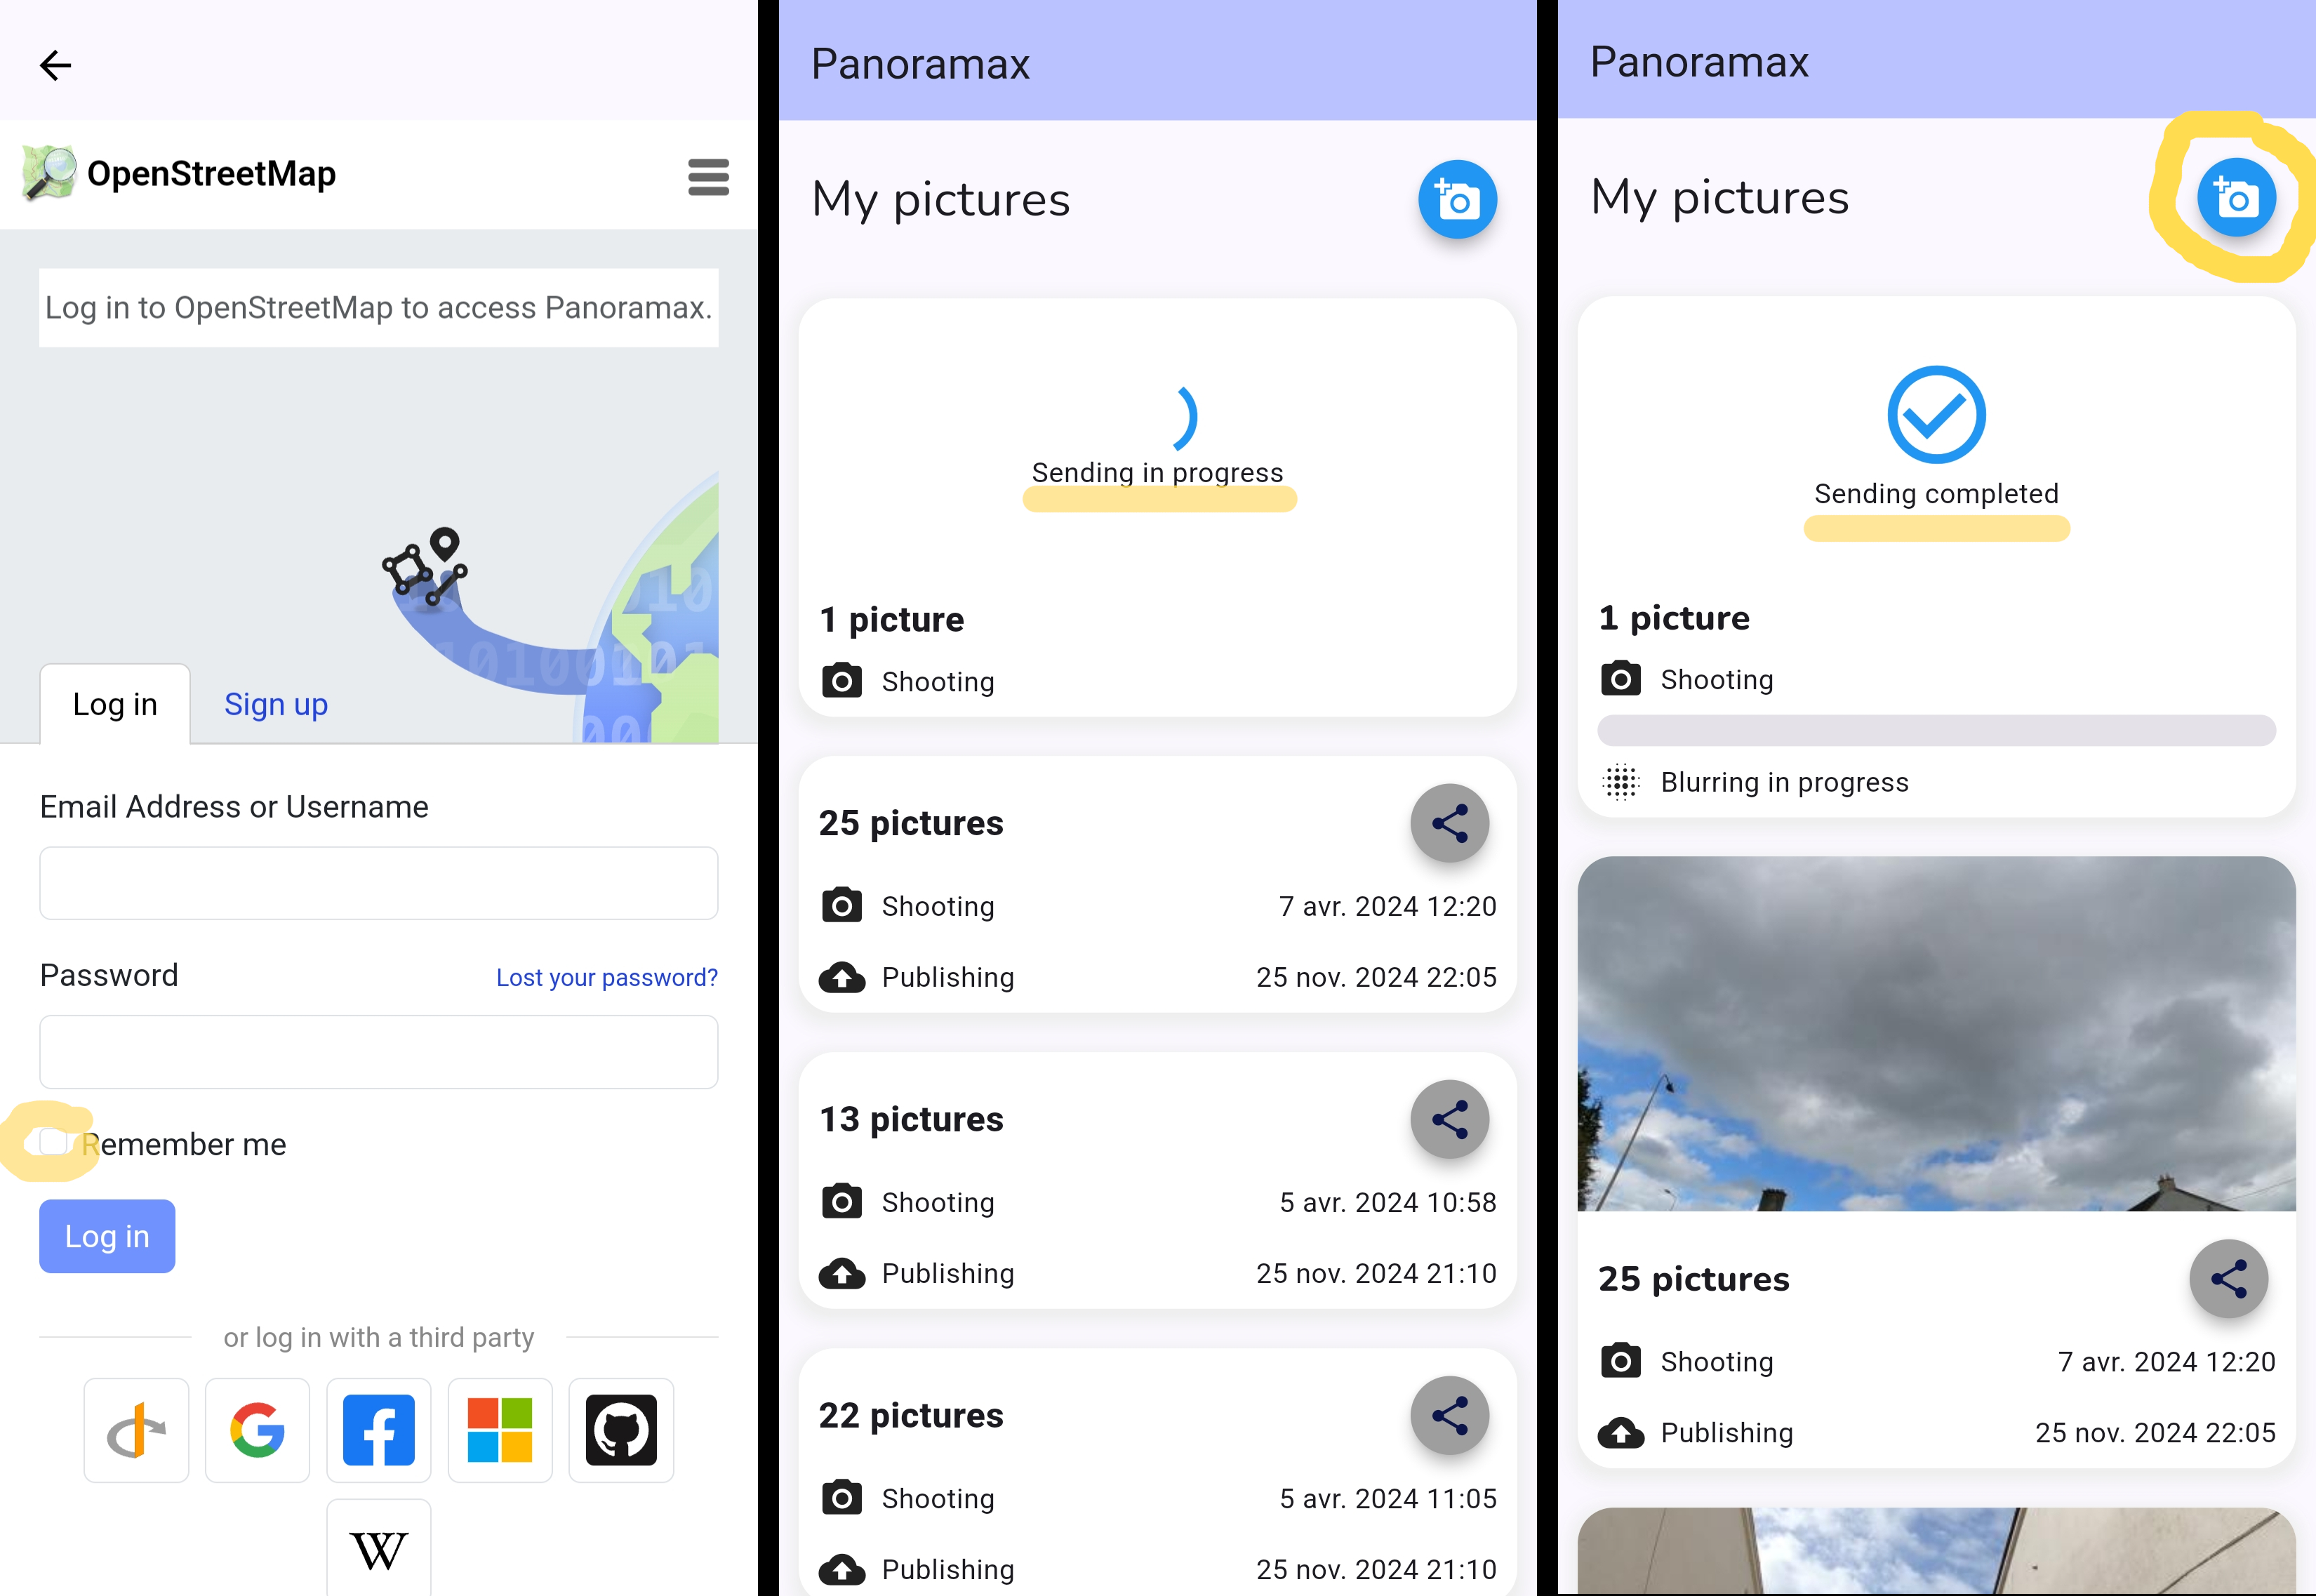
5 Upload is in progress.
6 Hit the blue camera button to add take more photographs.
Here’s a link to that photograph on panoramax.openstreetmap.fr. It’s not great.
Panoramax and mapping
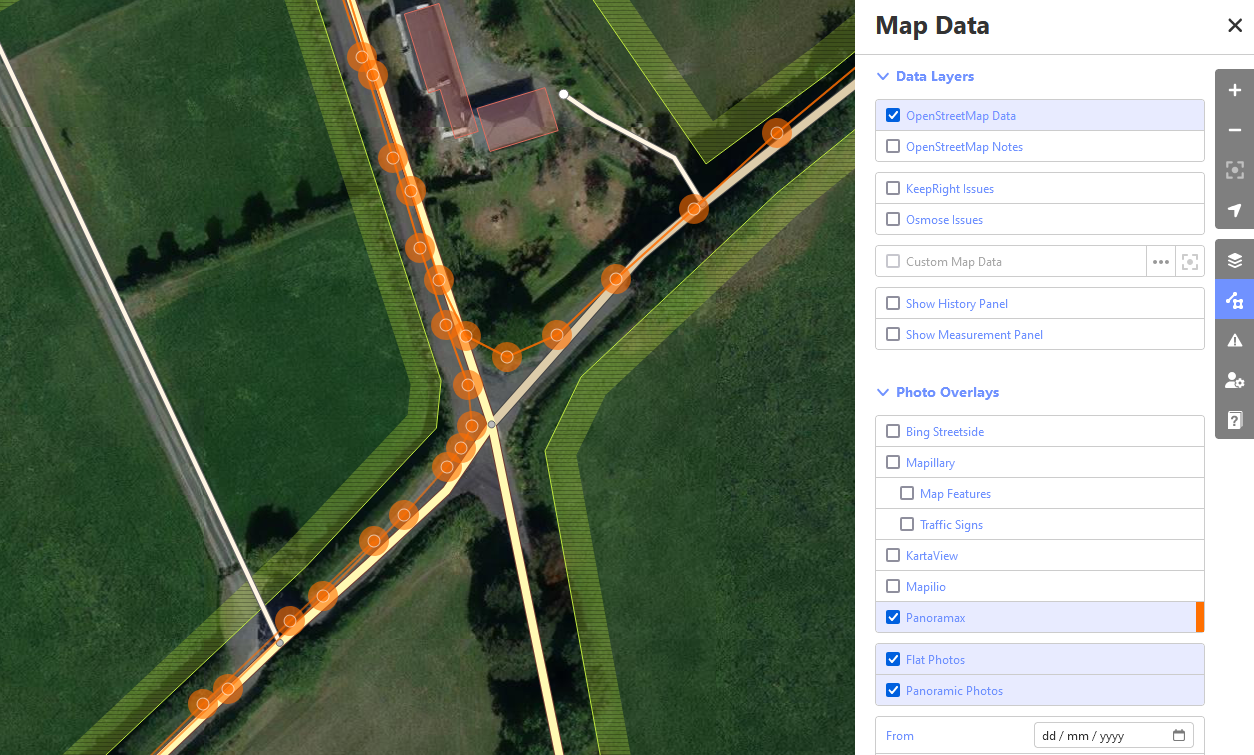
Contrary to what uninformed me said in the video, Panoramax is not yet fully implemented in JOSM. It is however possible to be used in the iD editor in the Photo Overlays menu. You can also filter by flat photos and panorama photos as well as by date.
There are monthly meetings with the developers on Jitsi; the first international meeting (in English) was held on November 25th 2024 with two representatives from the OSM Ireland community present. Check the upcoming events in the weeklyOSM newsletter for more information. The second meeting is planned for December 17th 16:00 UTC.

0 Comments